Watch App Prototypes with Pebble.js
01/16/2015
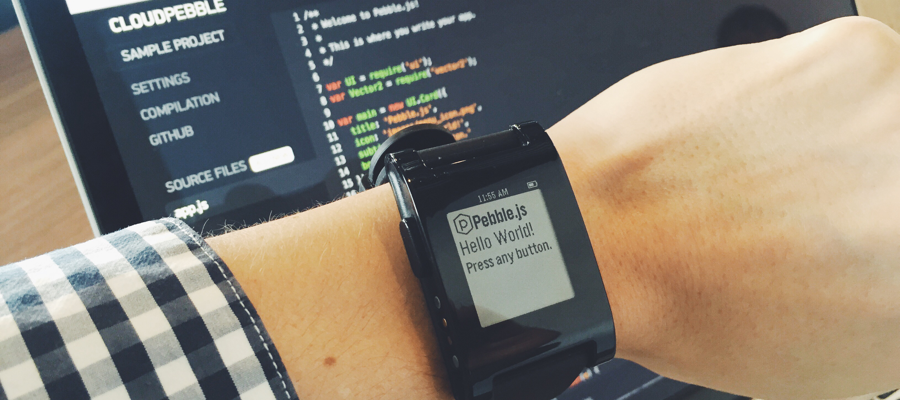
At Tack, we’re excited about watch apps. As with phones, we expect watches to further personalize users’ experience of software. These small-screen devices, always worn and visible, become a reflection of the wearer’s personality and have the potential to provide context and convenience to many aspects of daily life.
To explore watch apps, we decided to build a prototype for the Pebble. Fortunately, this is easily done using Pebble.js (still in beta) and CloudPebble, a cloud-based IDE for building Pebble apps via JavaScript. If you’re interested in quickly prototyping some ideas for a watch and have a Pebble, this is a good route to take.

Pebble.js gives you access to a number of Pebble SDK features: interface elements, interactions, data connectivity, accelerometer, and more. It’s all written in JavaScript and you can also include additional libraries as you see fit. All along the way, you can publish your app right to your Pebble via CloudPebble and the Pebble watch app.
Jumping into CloudPebble
Getting started with building a Pebble app is as easy as signing up for CloudPebble. Once you have, create a new Project, name it, and select Pebble.js as your project type. When you click Create, you’ll be immediately taken into the CloudPebble IDE with an app.js file that has a sample app already written out.
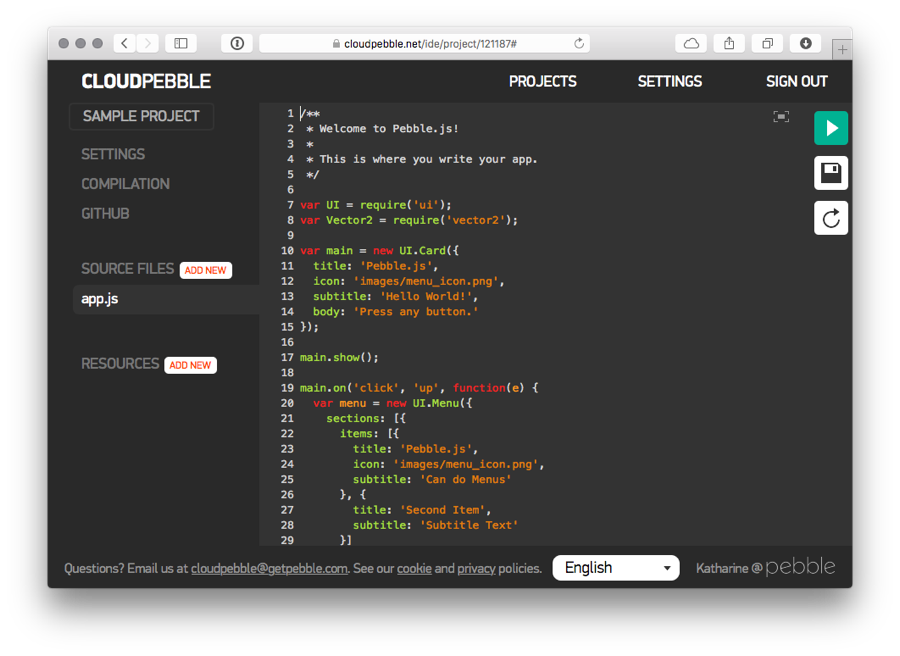
If you want to test an app, you need to turn on Developer Mode in the Settings of the Pebble app on your phone. Then, make sure you have the Pebble app open and click the Play button in the CloudPebble IDE. After some compiling and installation, you should see the app pop up on your watch! It’s that easy to get started.
Tip: You can take screenshots of your app via CloudPebble! When editing a project, click the Compilation link in the upper-left. You should see a Screenshot button in the center area. When interacting with your watch app, click that button to get a screenshot.
Working with interface elements
The Pebble SDK comes with a series of different interface and other visual elements you can use to build your app. These drop-in components make it easy to start illustrating your idea in watch form. Elements include:
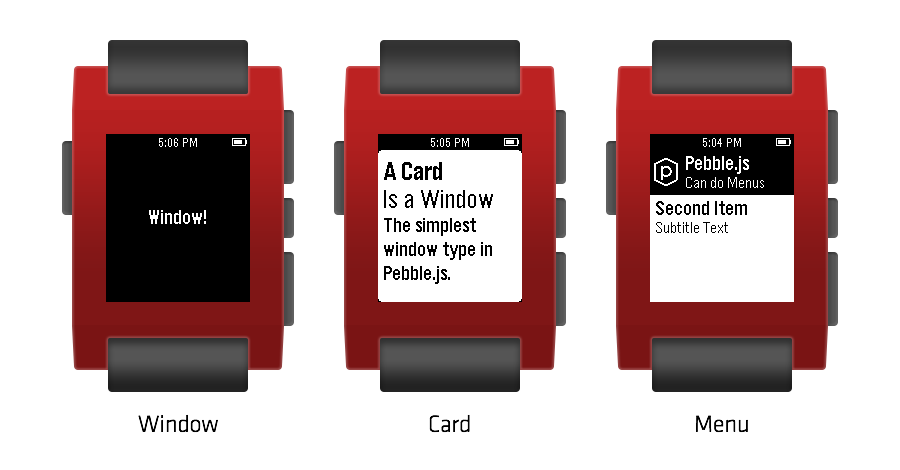
Window: The most flexible canvas to work with, which can contain other elements of different types.
Card: Contains a fixed series of elements, like a title, subtitle, and banner image.
Menu: A list of items, which are controlled by the up, down, and center buttons of the watch by default.
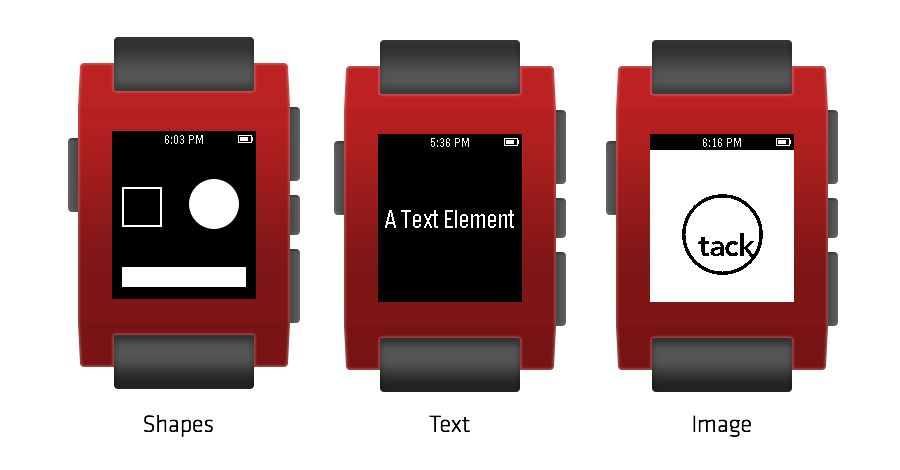
In addition to the items above, you can also work with other elements to make a more custom-looking interface. These elements include: Rectangle, Circle, Text, and Image.
Each of these elements have their own series of properties. These properties, in addition to other details, can be found in the Pebble.js documentation.
Note: Pebble has its own system fonts, which you can explore in this blog post.
Adding different interactions
The Pebble watch is controlled via four buttons: back, up, down, and center. As a developer, you have access to define the function of the up, down, and center buttons. The triggers for these buttons can be a press or long press, giving you a nice range of interactions to work with.
Note: A Menu automatically uses the up and down buttons for scrolling the list.
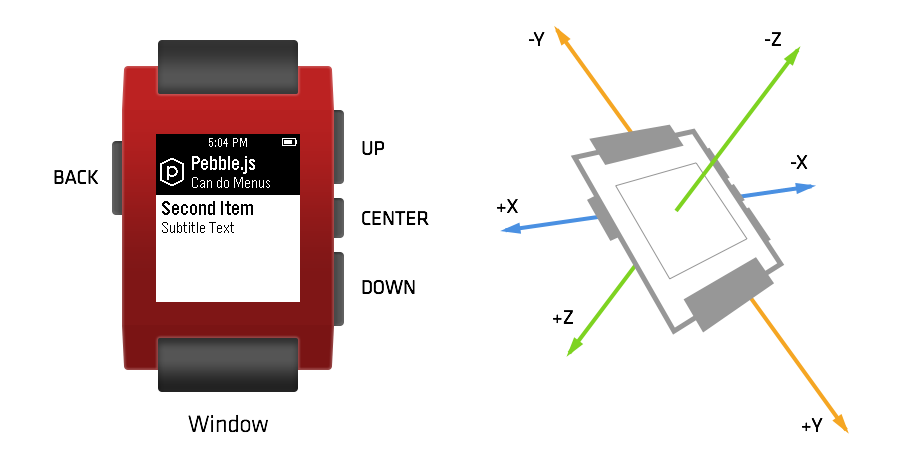
Another input mechanism provided by the Pebble is an accelerometer; this enables gestures such as wrist flicking to send commands or enable one-hand operation.
Connecting to data
You can certainly drop in some dummy data to make your watch app come alive and it’s a good way to test out some interface ideas. It’s even better when you can connect to a data source and send information back and forth. Pebble.js supports working with AJAX and JSON, which means it’s pretty easy to get external data sources to flow into your app.
var ajax = require('ajax');

ajax(
  {
    url: 'http://api.theysaidso.com/qod.json',
    type: 'json'
  },
  function(data) {
    console.log('Quote of the day is: ' + data.contents.quote);
  },
  function(error) {
    console.log('The ajax request failed: ' + error);
  }
);
In addition to displaying data, you can also send commands to services as you see fit. For example, liking content, turning a light on, etc. Nothing feels more magical than using your watch to send a command to another device.
Providing guidance and feedback
Animating elements is a great way to smooth out the experience and provide guidance. As with any interface, this additional level of detail can really make your Pebble app feel more polished and inviting. Right now, you can only animate the position and size of an element.

Visuals and animation can also be used for providing feedback, but the Pebble watch also comes with a vibration motor built in. You can access the vibration capabilities in your app via Pebble.js to create a short or long vibration. This is a great way to provide feedback that an operation was completed, there was an error, or anything else that may warrant an additional nudge to get the wearer’s attention.
var Vibe = require('ui/vibe');

// Send a long vibration to the user wrist
Vibe.vibrate('long');
Keep in mind that a watch interface should be just as glanceable as a phone interface, if not more so. A focused series of screens and limited actions will help keep your app approachable and easier to use.
Making an app more custom
Pebble.js and CloudPebble offer a number of other ways to make your app feel custom. You can specify a name and icon for your app, which shows up in the list of apps on the Pebble, and provide a settings screen that can be viewed via the Pebble app on a user’s phone.
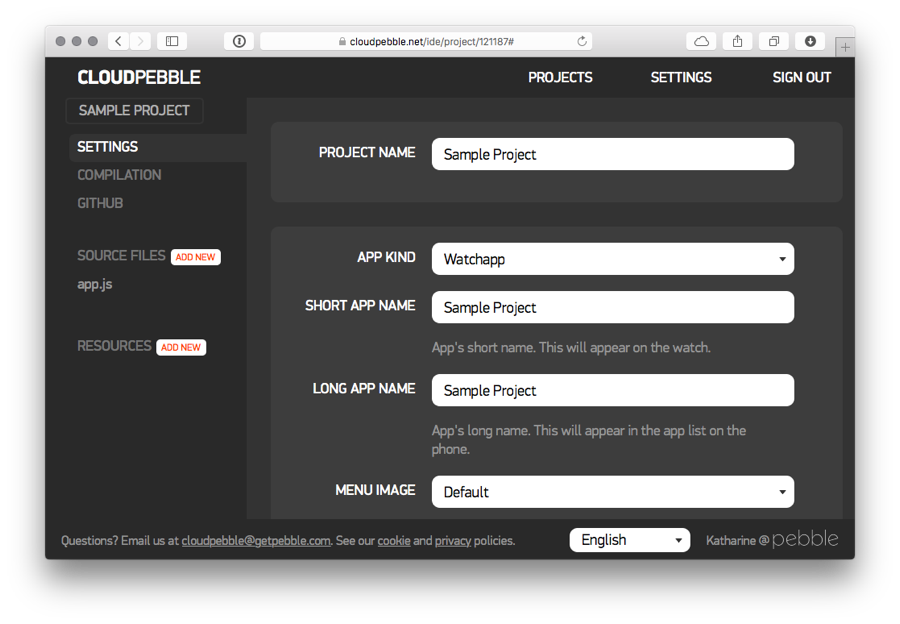
Setting the icon and name for an app is easy. In CloudPebble, when editing a project, just click the settings link in the upper-left. You can edit the name, upload an icon, and change other details of your app. You can also specify if your app will use location data and be configurable via a settings screen in the Pebble app on the phone.
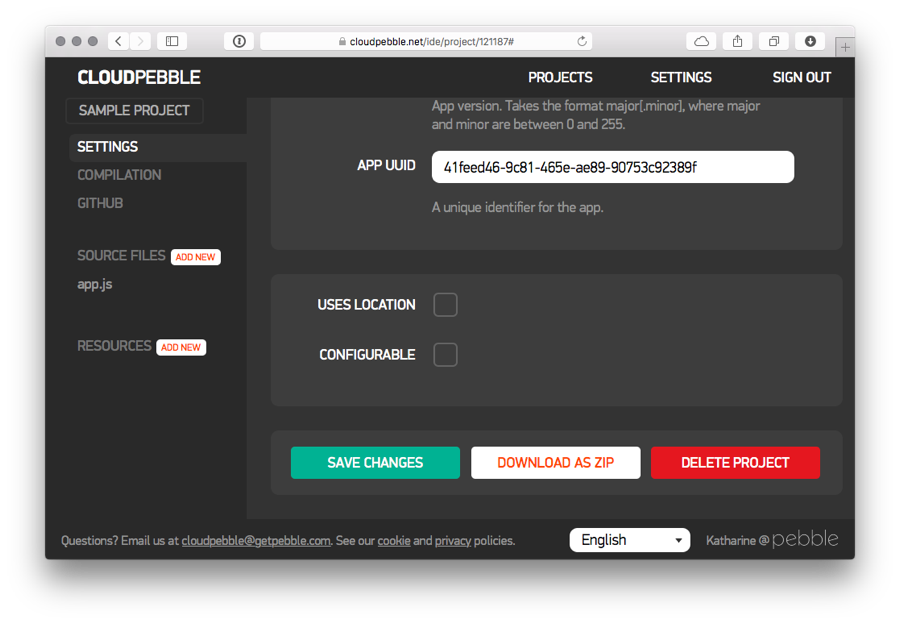
If you’ve set your app to be configurable, a Settings button will show up in the Pebble app on the phone. You can specify a URL that should be opened when that Settings button is tapped. You might want to have settings for things like authentication to a service, user-customizable options, etc.
You can learn more about working with Settings in the documentation.
It’s great for testing ideas
We stumbled across Pebble.js as we were exploring what’s new with the platform and found that it’s a viable approach for rapidly prototyping and testing out some of our ideas. Keep in mind a note from the documentation:
Pebble.js is still in beta, so breaking API changes are possible. Pebble.js is best suited for prototyping and applications that inherently require communication in response to user actions, such as accessing the internet. Please be aware that as a result of Bluetooth round-trips for all actions, Pebble.js apps will use more power and respond slower to user interaction than a similar native app.
If you’re interested in getting a jump on an easy way to start thinking about how a watch fits with your product’s offering, using Pebble.js and CloudPebble might be the way to go.