
Prototyping Pebble Smartstraps with littleBits
09/10/2015
We use littleBits a lot for prototyping hardware ideas because of the ease of being able to snap a variety of components together really quickly. With the vast library of littleBits that you can get, it seems as though it’s possible to build almost any idea you can think of. We love both the Pebble and littleBits, and have a bit of experience working with both of them.
For a recent hackathon, we thought bringing the flexibility of being able to snap different components together would be really useful for testing ideas for Pebble Smartstraps. What if we could make a kit and examples for people to prototype Smartstraps with off-the-shelf littleBits? Initially, we thought this was a super ambitious idea and would be happy walking away from the hackathon with the ability to press a littleBits button and have something happen on a Pebble Time.
Jumping In
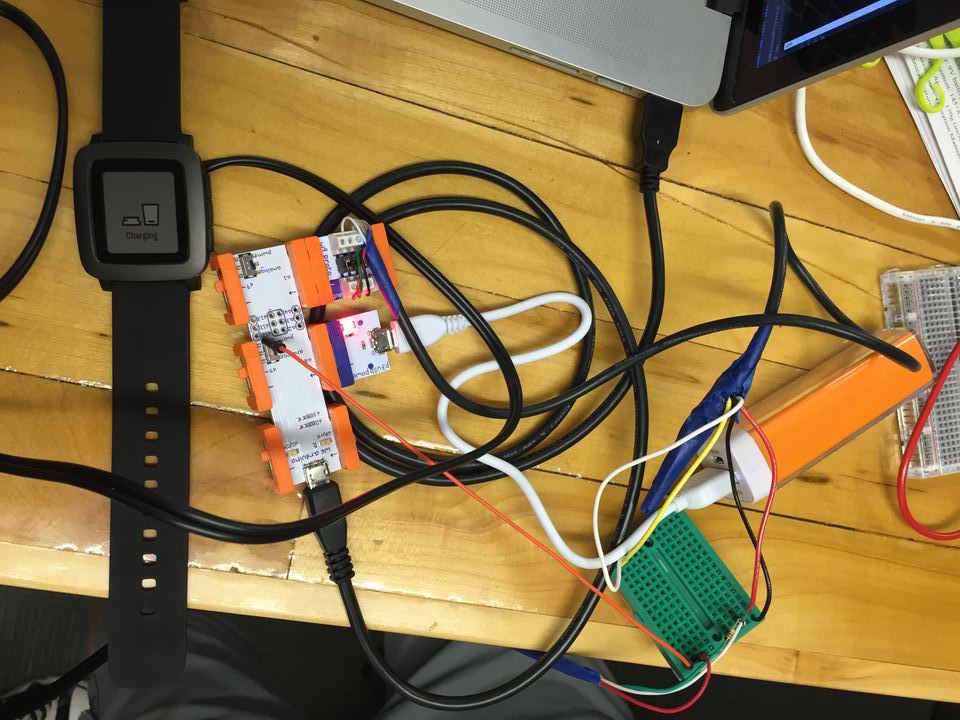
The first step was going through some examples and getting the littleBits to send some kind of signal as an input. We were able to do that with a button, slider, and a light sensor for some initial tests using an Arduino Duemilanove. This meant writing code on the Arduino side and the Pebble side.
It was pretty exciting being able to simply swap out and snap in different components on the first night. We had already exceeded our goal!
Pebble Rocks Hackathon: littleBits + Pebble Time Smartstrap — Progress 1 from Tack Mobile on Vimeo.
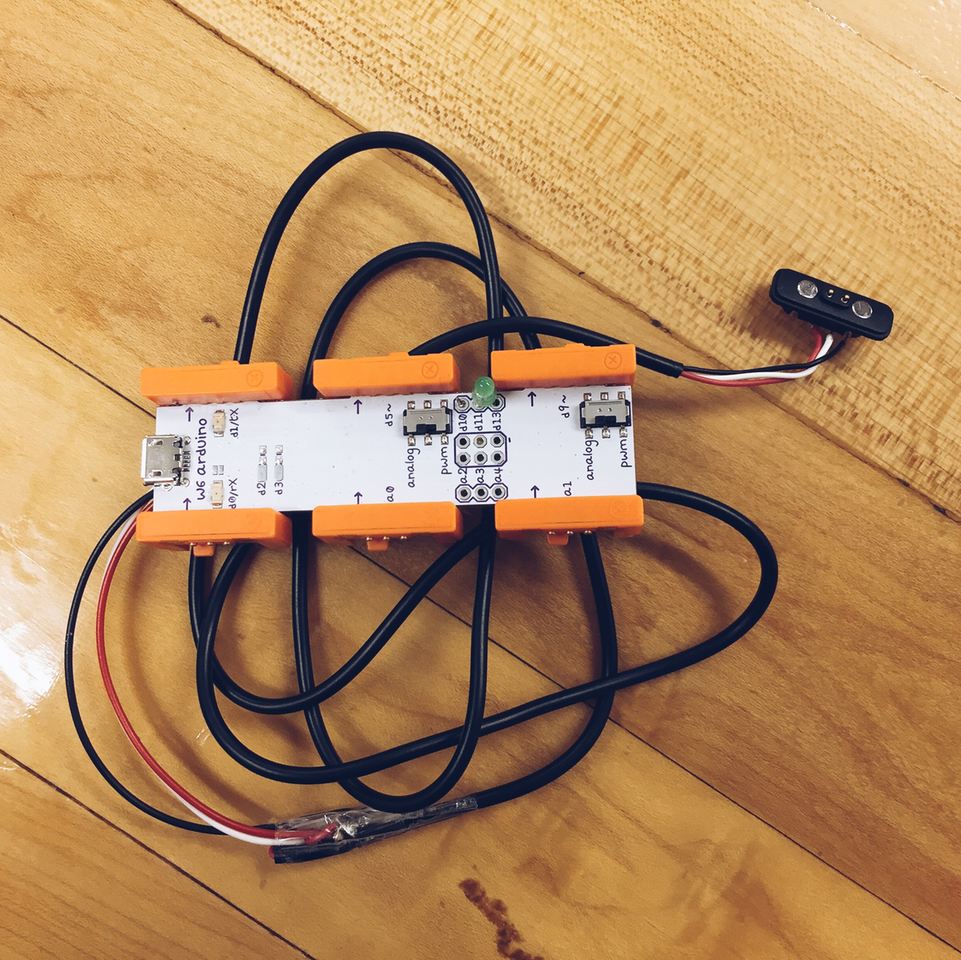
Once we had that working, we started exploring using the littleBits Arduino bit to try and condense the number of components in our project.
This led to exploring using the Pebble to control littleBits via the up and down buttons. Now we can go back and forth between the Pebble and any littleBits invention.
Pebble Rocks Hackathon: littleBits + Pebble Time Smartstrap — Progress 2 from Tack Mobile on Vimeo.
We began to explore other inputs and outputs between the Pebble and littleBits. How about snapping together an oscillator and speaker to make different sounds based on the Pebble’s accelerometer data?
Pebble Rocks Hackathon: littleBits + Pebble Time Smartstrap — Progress 3 from Tack Mobile on Vimeo.
Once we had what we wanted, we simplified the number of hardware components by connecting our Smartstrap connector directly to the littleBits Arduino bit. We also added an LED to let us know when there was a successful connection to the Pebble. This was also something we could reproduce or help others reproduce to start playing with littleBits and Pebble Smartstrap ideas.
Of course, we needed a logo for the project to go with the name – Pebblits. It combines the watch illustration of the Pebble with the illustrations used for littleBits.
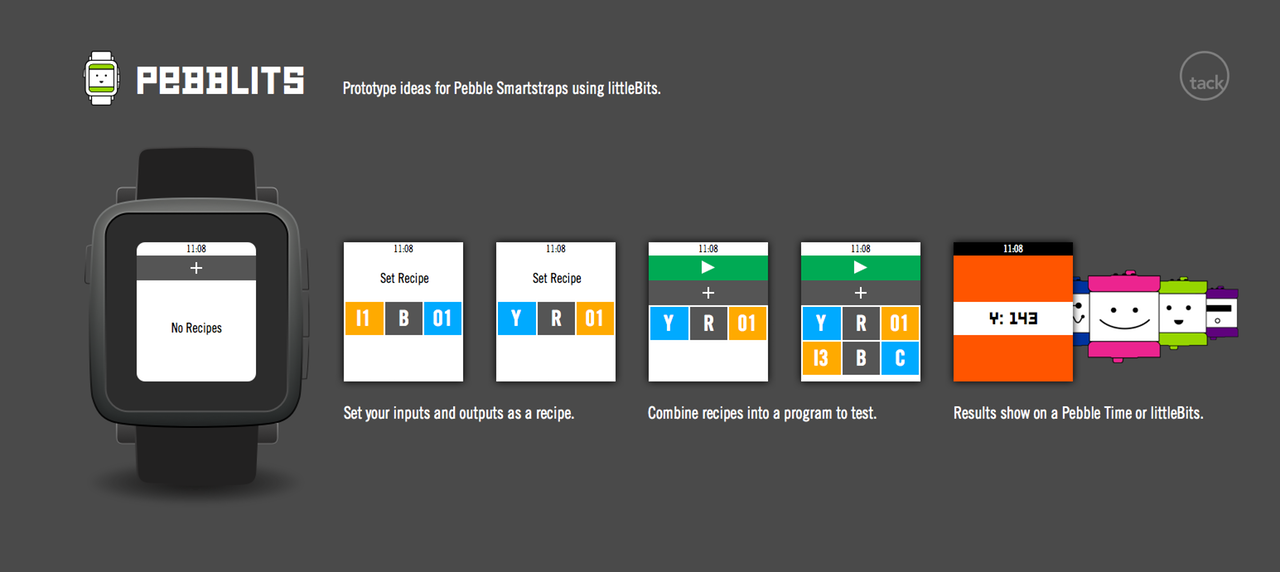
An initial idea for the interface would allow you to set inputs and outputs from the Pebble or littleBits as recipes. You can combine recipes and then run the program, which will show results on the Pebble or littleBits depending on your recipes.
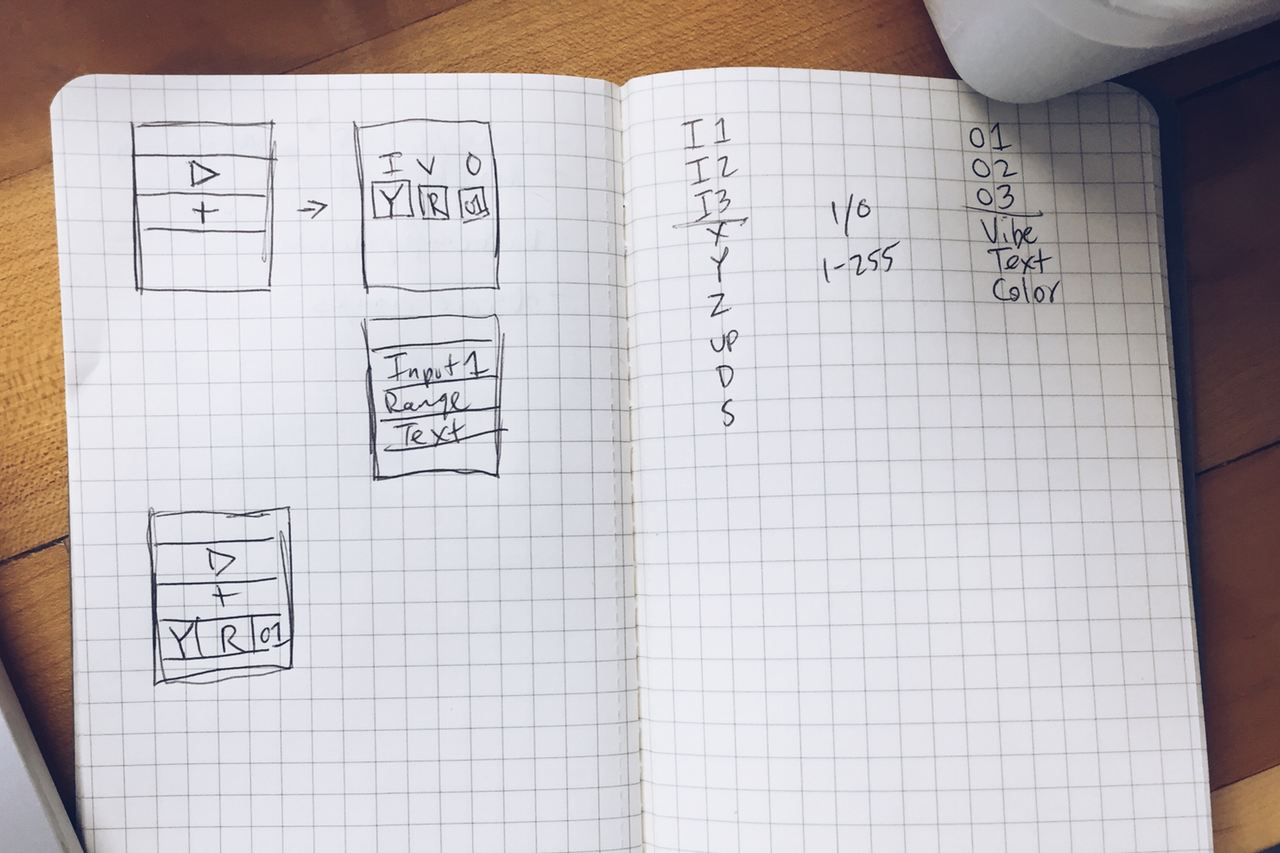
We mocked up a quick interface using Pebble colors and patterns based on the original sketches. For the demo, we thought we might need to shoot for a subset of functionality.
Where we ended up
In the end, we were able to create a Pebble app where you can toggle between using the littleBits as an input/output, or the Y value from Pebble’s accelerometer. We had a great time at the hackathon and look forward to pushing this idea further! You can see more projects from the hackathon on Hackster.io.
Pebble Rocks Hackathon: littleBits + Pebble Time Smartstrap — Progress 4 from Tack Mobile on Vimeo.